Painting wall: Common mistakes and how you can easily avoid them
A smooth, even finish doesn’t happen by luck. It comes from method clean prep, the right tools, and a calm, repeatable sequence. At Nourklusbedrijf, we see the same pitfalls derail DIY projects over and over. The good news? Each one has a simple fix. Whether you’re muur schilderen in a small hallway or tackling a full living room, this guide shows you how to prevent streaks, patchiness, and surprise shade shifts before they appear. Dusting isn’t prep. Proper prep starts with a check for grease, micro cracks, chalking, and sheen variations from previous touch ups. If you paint over contamination, the coat won’t anchor. Before painting wall, wash with a degreasing cleaner (kitchen zones need it), rinse with clean water, then let dry fully. Run your palm over the surface: if powder transfers, you’re dealing with chalking seal it with a bonding primer so your color doesn’t slide or fade unevenly.
Using filler like frosting
Heavy putty ridges telegraph through topcoats. Fill thin, feather wide, and sand in stages with a flat block. Prime repairs so they don’t “flash” (look shinier) under light. Many patchy finishes blamed on “bad paint” are simply unprimed repairs. If you’re painting wall after moving artwork, prime every patched hanger hole; that tiny step keeps the sheen uniform.
See also: Elevate Your Style with the Perfect Footwear
Ignoring light and viewing angles
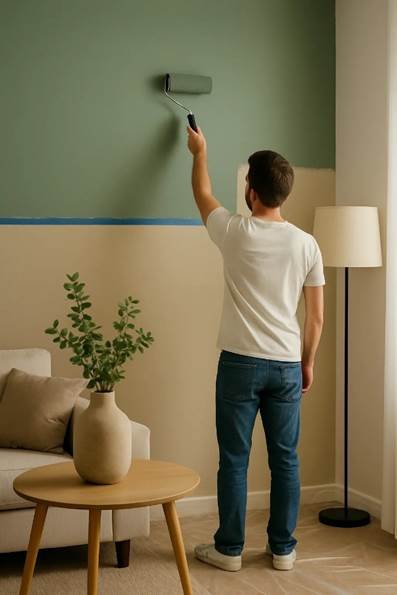
Paint changes under light. Side light from a window exaggerates texture and roller lines. Before painting wall, set work lights at a shallow angle across the surface; flaws will reveal themselves, and you can sand or back roll while everything’s still wet. After each coat, step sideways and scan from multiple angles what looks fine head on can show bands at sunrise.
Poor sequencing and lost wet edges
Lap marks happen when one area partially dries before the next stroke overlaps. Work top to bottom, then left to right, maintaining a live section about an arm span wide. Load the roller generously, apply in an “N” or “W” pattern, then lay off (light, single direction strokes) from dry to wet. When painting wall that meets a window, finish each pass toward the light source; it hides microscopic roller joins.
Ignoring light and viewing angles
Paint changes under light. Side light from a window exaggerates texture and roller lines. Before painting wall, set work lights at a shallow angle across the surface; flaws will reveal themselves, and you can sand or back roll while everything’s still wet. After each coat, step sideways and scan from multiple angles what looks fine head on can show bands at sunrise. More strokes do not equal better finish. Rolling back and forth as the film starts to tack tears the surface and leaves ropey lines. Put paint on, distribute, lay off, and stop. When painting wall with quick drying acrylics in a warm room, work in smaller sections and keep the can covered so the film doesn’t thicken mid project.
Believing “paint + primer in one” replaces primer
“Self-priming” topcoats cover color, but they don’t fix adhesion, stains, or porosity swings. New plaster, stained spots, smoke damage, glossy enamel, and repaired areas each need the right primer (alkali resistant, stain blocking, or bonding). If you skip it, painting wall turns into fighting blotches for two coats longer than necessary.
Wrong tape, wrong timing
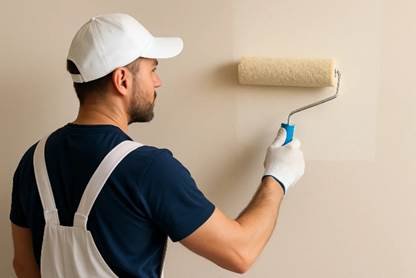
Painter’s tape should prevent bleed without pulling fresh paint. Use quality, low tack tape for delicate surfaces and burnish the edge before rolling. Most tapes want removal while the topcoat is just past tack free wait too long and you’ll tear a brittle film. When painting wall against ceilings or trim, score the tape line lightly with a sharp blade before pulling at a 45° angle for a crisp break. A damp roller sleeve thins the first meter of coverage; a dusty brush drags grit into your finish. Pre-wash new sleeves to remove factory lint, spin them dry, and pre-load with a little paint to “season” the fibers. For painting wall over long sessions, wrap the roller in plastic during breaks to keep it from skinning.
The one page checklist our pros use
Use this compact list to keep your project predictable from start to finish (and yes one list is enough):
- Prep: Degrease, rinse, dry; mark repairs; fill thin, sand flat; vacuum dust; spot prime patches and problem zones.
- Protect: Mask edges with the right tape; cover floors; remove or mask hardware.
- Tools: Quality microfiber roller (10 mm for smooth plaster), angled brush for edges, grid or tray, extension pole, work light.
- Application: Cut in a full section, then roll into the wet edge; distribute in an “N/W,” lay off once; move methodically across the wall.
- Finish: Maintain temperature/ventilation within spec; watch the light for bands; pull tape on time; let coats cure before cleaning or loading the room.
Picking the right sheen for the right room
Sheen isn’t only about look; it’s about durability and touch ups. Matte hides minor texture and is great for large living spaces, but choose a washable matte if hands will touch the wall often. Eggshell and satin add cleanability in halls and kids’ rooms while keeping glare low. Semi-gloss is tougher but unforgiving on imperfect plaster use it sparingly. When painting wall areas that meet tile or backsplash, a moisture resistant formulation guards against steam and splashes.
Color consistency: Batches, edges, and “picture framing”
If you stop and start with different batches, tiny tint shifts can appear. Buy enough paint in one go and “box” it (mix cans together) for uniformity. Cut in areas can look darker (“picture framing”) if rolled film thickness differs from brushwork. The fix: keep a wet edge from brush to roller and lay off the whole section in one direction. For painting wall with deep colors, a tinted primer undercoat reduces banding and the number of topcoats needed.
When to call a pro
Some projects deserve extra hands: high stairwells, failing plaster, smoke stained surfaces, or water damage. Professional crews bring dust free sanding, airless sprayers for ultra even films, and primers matched to the chemistry of your substrate. At Nourklusbedrijf, we scope your room, map a daily plan you can live with, and deliver tidy checkpoints so you always know what’s next. If your schedule is tight, or previous coats are fighting you, we’ll rescue the finish and keep the timeline intact.
Your path to a clean, durable finish
Great painting is 80% preparation and 20% calm execution. Diagnose, prime where needed, choose the right roller, and manage your wet edge. Keep one checklist in view and the rest becomes muscle memory. Whether you’re painting wall in a single bedroom or refreshing your entire ground floor, a few disciplined habits will save you hours and spare you costly rework. If you’d like a predictable, dust controlled result without the weekend marathon, Nourklusbedrijf is ready to help. From color and sheen advice to meticulous prep and a uniform finish, we treat your rooms with the same care we bring to commercial projects. Tell us what you need, and we’ll turn “nearly right” into “exactly as imagined.”
Discover how Nourklusbedrijf can support you with tailor made solutions.